Prices incl. VAT plus shipping costs
Ready to ship today. Delivery time appr. 1-3days.
- Order number: 2016-sppucks
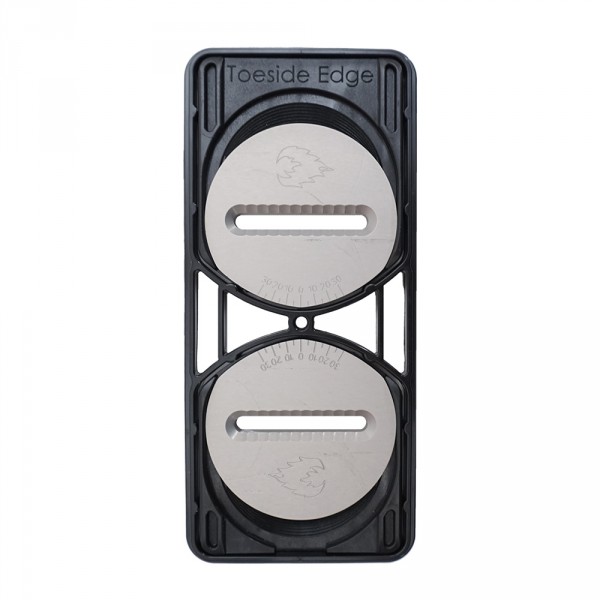
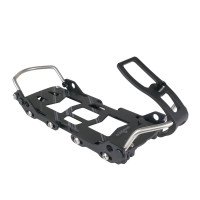
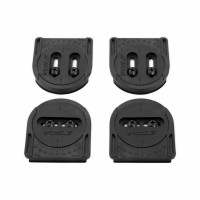
The aluminium Spark Pucks have been available since 2015.
Advantage:
They are better to adjust because you have more options. It is easier to put the boat with binding in the
desired e.g. central position.
Disadvantage:
On icy days (wet snow at the beginning of the tour) the ALU disks have a small disadvantage:
The ice (frozen wet snow) sticks more easily to the aluminium. On the plastic voile pucks the ice hardly holds on and is easier to remove.
Spark Alu pucks are also a little heavier than voile pucks ( approx. 20g per puck ).
Canted 3° pucks can allow the rider to ride more relaxed because the knees are automatically moved more inwards. This results in a better coordination between ankle, knee and hips when driving. The result is a better and more balanced riding position. This riding position is above all gentle on the joints. In practice, the difference is rarely really taken seriously. Unless you have hard boots. But what you notice is that it is a bit more tricky to attach the binding before you push it over the pucks. But it is also a matter of practice.
Standard or canted bindings fit all puck bindings:
Spark
SP United
Voile-USA

1. Aluminum Washers
Oversized aluminum center washer overlaps the binding channels for maximum strength and rigidity.
2. Yellow Patch Screws
8 x M6 x 16 mm flat head screws. +1 extra for your hardware stash.
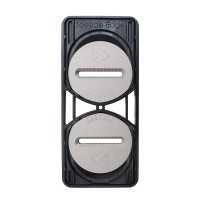
3. Toeside Pucks
For placement on the toeside edge of your board.
4. Mini Alignment Tool
For use with Arc, Magneto, and Burton Hitchhiker bindings.
5. Heel Pucks
For placement on the heel edge of your board.
6. Full Alignment Tool
For use with all Spark R&D and Burton Hitchhiker bindings.

1= +/- 30° Angel Markers
2= Yellow Patch Screws
3= Blue Patch Screws
4= T1 Step Lockers
5= Puck Edge Alignment
6= Fixie Clips
7= Tip & Tail Clips
Check your board settings
Structure of Spark flat puck and canted puck:
For setting up Spark flat pucks, see the instructions included with the packaged pucks
Setting up Spark Canted pucks is slightly different
For other brands of pucks, see the setup instructions on the manufacturer's website.
ST Touring Brackets:
Attach the ST Touring brackets with the bolts highlighted in yellow.
Heel Rest:
Orient the heel rests with the arrow pointing toward the nose of the board. Secure the heel rests with the blue-coded screws.
OUR BINDINGS ARE FULLY ADJUSTABLE!
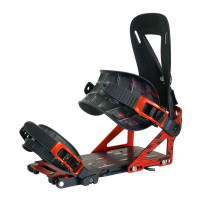
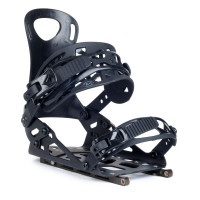
If the fit isn't perfect, use the included Spark pocket tool to adjust the length of the toe and ankle straps, the position of the heel cup, and the rotation of the highback. Then put the tool in your backpack so
you always have it with you when you're out and about.
Check occasionally to make sure the screws are tight!
Fixie Clips
With a sleek, lightweight aluminum design with no moving parts, they are stiff, simple, have integrated adjustability and require no rotation. Just assemble the board and ride off!
Tip & Tail Clips
Our tip and tail clips provide a custom fit that accommodates the variability of each board. With five progressively narrower notches, you can make your board as narrow as you want.
T1 Step Lockers
Allow splitboarders to lock their heel in touring mode to better adapt to different split-ski terrain. The lockers attach to the heel support. Turn the lever to lock. To unlock, turn the lever back.
Puck Troubleshooting (all brands)
The outside length from puck to puck should be 7 ⅝” (19.35 cm).
The bindings should slide on easily. If they feel tight, check the alignment of the pucks and make adjustments if necessary.
If your pucks are brand new, they may feel tight but will loosen up after a few transfers.
If they're still too tight, lightly sand the top and sides of the pucks with fine-grit sandpaper. Check the fit while the pucks are wet.
When the bindings of the pucks are in riding mode, you should be able to fold down the toe ramp slightly. If this is not possible, loosen the screws and gently push the puck in at the toe side.
Made in Montana
Spark R&D, based in Bozeman, Montana, is owned and operated by riders. Since 2006, the company has been committed to driving innovation in the field of splitboarding. With the Bridger Mountains in mind, we design and build splitboard bindings and accessories with backcountry performance in mind.
All products are manufactured and assembled in our shop in Bozeman, Montana, USA. From machining to anodizing, from laser engraving to assembly, everything is done by a team of experienced employees who are also passionate splitboarders. In-house design and manufacturing capabilities allow for rapid advancement of our products and give us the flexibility to serve niche customers in the splitboard market. Spark R&D continues to grow and strive for perfection, based on customer needs and rider feedback to keep pace with the rapidly growing splitboard community.
 |
PROCESSING From standard sheets to custom extrusions, our aluminum is sourced locally and is the raw material for the majority of our binding and accessory parts. With our CNC mills and lathes and our extremely talented machinists, we are able to produce a wide variety of parts in all shapes, sizes, and complex geometries. All scraps are sorted and recycled. |
 |
ANODIZING This electrochemical process is how we add a vibrant coat of color to our aluminum parts such as baseplates, heel straps, tail clips, etc. Anodizing not only adds beautiful colors, but also creates an aluminum oxide layer on the parts that hardens the material to make it stronger, more corrosion resistant, and more slippery to prevent snow from sticking, and to generally protect the material. It is a much more environmentally friendly process than powder coating or painting, and it adds very little weight or thickness to the parts. The anodizing station is like a small chemistry lab and requires precise operation and maintenance. All wastewater is evaporated or tested and dumped, and our system has specially insulated dye and rinse tanks to reduce energy use. |
 |
PLASTICS AND INJECTION MOLDING We make almost all of our plastic parts in house, from smaller parts like snap blocks to larger parts like our Rip 'N' Flip highbacks and Pillow Line straps! We now have two injection molding machines to keep up with the growth in this area of our manufacturing. One of the coolest parts about our plastic programs is that we also make all of our own molds in our machine shop. |
 |
PAD PRINTING & PRE-ASSEMBLY Our product graphics were originally all laser engraved, but since 2012, we have been doing pad printing in-house, which has opened up a world of product graphic possibilities for us. Not only is it faster, more colorful and consistent, but it's fun, too. We select our own inks, test them, and match colors. Every Spark product with graphics was hand-printed by one of our employees. Pre-assembly is the last preparation before a part goes to the assembly table. Every end product is a little different, but pre-assembly generally involves a mix of printing, bending, fitting, and pressing. |
 |
MANUFACTURING Our modern manufacturing line is equipped with a variety of air guns, multiple quality control checkpoints, and an incredible team of detail-oriented, hardworking men and women. Blasting from the speakers in the workshop is everything from hip-hop to hair metal. Aside from the eye-catching technology in our factory, the employees are Spark R&D's greatest asset. Our team is just as passionate about making a good product as they are about letting loose in the nearby mountains. |


